

Guide to All PIMD Parties
Hi Everyone! After some conversations with War-King about his original guide, he allowed me to help rework and expand the guide to be more relevant to PIMD players in the present. Additionally, you will find information regarding Club Bonus Items, Premium Party Items, and an explanation of the significance of damage in parties. The information regarding parties will be organized by party type. Each party will display the drops available for the party, the duration of the party, and damage needed to finish each bar, as well as the total damage needed to finish the party. If you find any discrepancies or new information that can improve the guide, please wall or gift me @Day and I will make corrections as soon as possible.
Visual Update to Parties 2026

On March 2, 2026 ATA released an update to the current backgrounds, party actions, awards, trophies, and copy across multiple series of parties. This was ONLY a visual change and did not affect party balance and design. A few parties also got a name change:
Enjoi Jpop!
 Karaoke Night
Counter Culture
Coffee CultureDumpster Dive
Quad GoalsNo Hand Brakes!
Easy RideBlue Plate Special
Off the GriddleArcade (Mis)fire
Band TogetherFirst World Problems
High ScoreYou can view the new style of graphics below:
Hipster > Slack Pack


Otaku


VIP Pass


Understanding Damage
Where to Find Your Damage
Damage for parties can be found underneath the bars that display party progress. It varies with each hit and is not related to strength and intelligence lost. Check below for examples! (Android is on the left and iOS is on the right)

Damage vs. Hits
The one thing that is largely misunderstood about parties is that there is no set amount of hits needed to complete a party. This is not to say that a player can not have an average amount of hits per party, but there is certainly not a specific number of hits to complete a given party. Now, an average amount of hits for a given player can be calculated by each bar in a party, so in theory, a player could find out the rough amount of hits it may take them to complete a bar or party if they know their average damage per hit.

As you can see in the images above, the damage varies even though the player is hitting the same bar of the party. Additionally, the player makes a consistent amount of Cash and loses a consistent amount of both intelligence and strength. This is why it is important to know that different types of bars may have different levels of damage that are required in order to complete the bar. Therefore, a party with a higher amount of damage may not necessarily take as long depending on how much damage a player can do on each bar.
Estimating Hits
Now that you have a better understanding of the role damage plays in parties, let’s try estimating hits!
If a player is trying to calculate how many hits it would take to complete Bar A, they would first want to find the average level of damage dealt per hit. For best results, the player should hit Bar A at least 5 times. The more times the player chooses to hit, the more accurate the calculations can be. After hitting, add up the sum of the total damage for the 5 hits.

Damage for parties can be found underneath the bars that display party progress. It varies with each hit and is not related to strength and intelligence lost. Check below for examples! (Android is on the left and iOS is on the right)
Damage vs. Hits
The one thing that is largely misunderstood about parties is that there is no set amount of hits needed to complete a party. This is not to say that a player can not have an average amount of hits per party, but there is certainly not a specific number of hits to complete a given party. Now, an average amount of hits for a given player can be calculated by each bar in a party, so in theory, a player could find out the rough amount of hits it may take them to complete a bar or party if they know their average damage per hit.
As you can see in the images above, the damage varies even though the player is hitting the same bar of the party. Additionally, the player makes a consistent amount of Cash and loses a consistent amount of both intelligence and strength. This is why it is important to know that different types of bars may have different levels of damage that are required in order to complete the bar. Therefore, a party with a higher amount of damage may not necessarily take as long depending on how much damage a player can do on each bar.
Estimating Hits
Now that you have a better understanding of the role damage plays in parties, let’s try estimating hits!
If a player is trying to calculate how many hits it would take to complete Bar A, they would first want to find the average level of damage dealt per hit. For best results, the player should hit Bar A at least 5 times. The more times the player chooses to hit, the more accurate the calculations can be. After hitting, add up the sum of the total damage for the 5 hits.
In this example, the player did a total damage of 1,886 for 5 hits. Next, you can find the average damage done per hit and the number of hits per bar by using these formulas:
Total Damage ÷ Total Hits = Average Damage Per Hit
Total Damage to Complete Bar ÷ Average Damage Per Hit = Amount of Hits Per Bar
Then, plug in the numbers accordingly!
1,886 ÷ 5 = 377.2
The number 377.2 is our average damage per hit! Let’s finish up by using the second formula. In this example, Bar A takes 10,000 damage to complete the bar.
10,000 ÷ 377.2 = 26.5111347 ≈ 27
Since you can not do half of a hit, in this situation we would round up to 27. Therefore, it would take the player approximately 27 hits to complete Bar A.
Different Types of Bars
There are four main options when hitting a party. Each bar corresponds with the PvP actions: Fight, Dance, Prank, and Eavesdrop. Fight is the only strength-based bar, with the other three bars being intelligence-based. This does not necessarily mean that an intelligence build will be more effective or make more Cash on bars but does contribute to the damage done on the bar.

Dance, which is the same as Rave, Swipe, Tease, and Eat.
Prank, which is the same as Lecture, Chug, Complain, and Facepalm.
Eavesdrop, which is the same as Sigh, Bro-Fist, Drink, and Giggle.
As you can see, the four original options can often appear with both different icons and names depending on the party. Invite parties also have their own names for the different hit options, and it often pertains to the hunt.
Max Drops and Plunder
Each party has a maximum amount of drops that can be received regardless of stats, amount of hits, or consumables used. The only bonus that can increase the maximum drops of a party can be purchased through the store. Current max drop amounts can be viewed below (Main Story Drops / Side Story Drops):
POTD: 126 / 28
PPOTD: 245 / 49
Kinis: 250 / 50
Cats: 500 / 100
Dogs: 700 / 180
*Note: You can only receive one type of side story drop at a time, meaning you must complete the first side story before moving on to the next one.
POTD: 126 / 28
PPOTD: 245 / 49
Kinis: 250 / 50
Cats: 500 / 100
Dogs: 700 / 180
*Note: You can only receive one type of side story drop at a time, meaning you must complete the first side story before moving on to the next one.
Trophy Drop Rates & Rare Drops
All parties have a 5-15% chance of dropping a given trophy to all members of the club who have actively participated in the party. The drops are completely random, and the use of DNs and or Care Packages does not increase your chances to receive a trophy. Higher hits, plunder, and damage also have no effect on the drop rate.
Rare Drops:
Rare Drops:
Updated List by @Geass


1. HOT TUB (Limit 1)
Stats: (10,000/10,000)
 All VIP Pass Parties
2. CLOUDPACA (Limit 50)
Stats: (30,000/30,000)
Cat Cafe
3. MOUSTACHE (Limit 1)
Stats: (0/60,000)
First World Problems
Blue Plate Special
Arcade (Mis)fire
4. HOT WINGS (Limit 1)
Stats: (70,000/0)
Restless Keg Syndrome
IT'S BROSTEP, BRAH!
5. POPSICLE (Limit 1)
Stats: (80,000/0)
Cosplay Please
6. CACTUS (Limit 1)
Stats: (0/80,000)
Back Alley Debut
Art Starzzz
Hype Machine
7. HEALTH WATER (Limit 1)
Stats: (90,000/0)
Skyhigh Party
Limo Luxury
Just Dance!
8. BUFF PUP (Limit 4)
Stats: (100,000/0)
Fitspiration
9. BABY KITSUNE (Limit 50)
Stats: (60,000/60,000)
Cat Cafe
10. TOP DOG TROPHY (Limit 1)
Stats: (140,000/140,000)
Frisbee Follies
Restless Keg Syndrome
Enjoi J-POP! (PRO)
Cosplay Please (PRO)
Counter Culture (PRO)
11. BENTO BOX PRO (Limit 1)
Stats: (200,000/100,000)
Cosplay Please (PRO)
Cat Cafe
12. LUCKY BUB PRO (Limit 1)
Stats: (100,000/200,000)
Anime Expo (PRO)
13. 3-LEGGED SHELTER DOG (Limit 1)
Stats: (0/300,000)
Arcade (Mis)fire
Blue Plate Special (PRO)
First World Problems (PRO)
14. DIRTY POSTER (Limit 1)
Stats: (0/320,000)
Restless Keg Syndrome
IT'S BROSTEP, BRAH!
15. PANDA (Limit 1)
Stats: (0/320,000)
Cosplay Please (PRO)
16. SEAL PUG (Limit 1)
Stats: (350,000/0)
Back Alley Debut (PRO)
Hype Machine (PRO)
Art Starzzz (PRO)
17. WHITE TIGER (Limit 1)
Stats: (400,000/0)
Skyhigh Party (PRO)
Limo Luxury (PRO)
Just Dance! (PRO)
Cat Cafe
18. SCHOOL UNIFORM PRO (Limit 1)
Stats: (300,000/300,000)
Big In Japan (PRO)
Cat Cafe
Note: As of June 18th 2026, only the Cloudpaca, White Tiger and Kitsune still drop from parties.
1. HOT TUB (Limit 1)
Stats: (10,000/10,000)
All VIP Pass Parties2. CLOUDPACA (Limit 50)
Stats: (30,000/30,000)
Cat Cafe3. MOUSTACHE (Limit 1)
Stats: (0/60,000)
First World ProblemsBlue Plate SpecialArcade (Mis)fire4. HOT WINGS (Limit 1)
Stats: (70,000/0)
Restless Keg SyndromeIT'S BROSTEP, BRAH!5. POPSICLE (Limit 1)
Stats: (80,000/0)
Cosplay Please6. CACTUS (Limit 1)
Stats: (0/80,000)
Back Alley DebutArt StarzzzHype Machine7. HEALTH WATER (Limit 1)
Stats: (90,000/0)
Skyhigh PartyLimo LuxuryJust Dance!8. BUFF PUP (Limit 4)
Stats: (100,000/0)
Fitspiration9. BABY KITSUNE (Limit 50)
Stats: (60,000/60,000)
Cat Cafe10. TOP DOG TROPHY (Limit 1)
Stats: (140,000/140,000)
Frisbee FolliesRestless Keg SyndromeEnjoi J-POP! (PRO)Cosplay Please (PRO)Counter Culture (PRO)11. BENTO BOX PRO (Limit 1)
Stats: (200,000/100,000)
Cosplay Please (PRO)Cat Cafe12. LUCKY BUB PRO (Limit 1)
Stats: (100,000/200,000)
Anime Expo (PRO)13. 3-LEGGED SHELTER DOG (Limit 1)
Stats: (0/300,000)
Arcade (Mis)fireBlue Plate Special (PRO)First World Problems (PRO)14. DIRTY POSTER (Limit 1)
Stats: (0/320,000)
Restless Keg SyndromeIT'S BROSTEP, BRAH!15. PANDA (Limit 1)
Stats: (0/320,000)
Cosplay Please (PRO)16. SEAL PUG (Limit 1)
Stats: (350,000/0)
Back Alley Debut (PRO)Hype Machine (PRO)Art Starzzz (PRO)17. WHITE TIGER (Limit 1)
Stats: (400,000/0)
Skyhigh Party (PRO)Limo Luxury (PRO)Just Dance! (PRO)Cat Cafe18. SCHOOL UNIFORM PRO (Limit 1)
Stats: (300,000/300,000)
Big In Japan (PRO)Cat CafeNote: As of June 18th 2026, only the Cloudpaca, White Tiger and Kitsune still drop from parties.
Attack Items
Among the various items found in the Store, there are consumable items that can be used in both parties and PvP. Both Attack and Defense Items allow players a better chance at winning the given action and are often referred to as “Pots”. However, only attack items are necessary for parties. These items offer a range of stats, and prices, and can be intelligence or strength-based. The average player will likely not need to make use of Pots while partying unless they are attempting a PRO Party or the highest-difficulty Party for Invites. All Pots can be purchased for Cash in the Store, and are not found anywhere else in the game.
Note: ALL items listed above are consumable items, and can only be used once.
Note: ALL items listed above are consumable items, and can only be used once.
Club Bonus Items

Amps can be obtained from various boxes, the Spinner, Stories, and XC rewards. Wild Amps are the only amp that can be directly purchased in the Store, these amps can e used for any party and can stack on top of other amps for an added bonus. All amps need to be activated with their corresponding Party Amp Keytars that can be purchased for 50 Cash in the Store. When used, amps increase cash from party actions by 10%.

Jets
Limos
Yachts
Jets can only be obtained by purchasing them directly from the Store for 29 Silver XC Crowns. Once purchased, the item can be activated with a Party Jet Key, also in the store, for 50 Cash. When used, this item will start the current party immediately and will give a 20% drop boost upon completion. If the club successfully completes the party, all participants will continue to receive this 20% drop boost for an hour, even if they leave the club.
Limos
Limos can be obtained from various boxes, the Spinner, Stories, and XC rewards. They are not able to be directly purchased in the Store. To activate a Limo, purchase a Party Limo Key for 50 Cash in the Store. When used, this item decreases the party start time by 10 minutes and will cause the party to start immediately if the remaining time is 10 minutes or less.
Yachts
Yachts can be obtained from various boxes, the Spinner, Stories, and XC rewards. They are not able to be directly purchased in the Store. To activate a Yacht, purchase a Party Yacht Key for 50 Cash in the Store. When used, this item will start your party immediately.

Slow Jams can be obtained from various boxes, the Spinner, Stories, and XC rewards. They can also be purchased directly from the Store for 5 Extra Credits and are activated with a Slow Jam Spreader that can be purchased for 50 Cash in the Store. When used, this item extends the current party by 15 minutes; only 4 Slow Jams can be used per party.
Premium Party Items

Pizza Bikinis can be obtained as a drop from parties, various boxes, the Spinner, Stories, and XC Rewards. Additionally, they can be purchased directly from the Store for 34 Extra Credits. This item is often referred to as a "Kini", is an item that is required to complete the Art Skool Party: Pizza Pop(ART).

Hypnocats can be obtained as a drop from parties, various boxes, the Spinner, Stories, and XC Rewards. Additionally, they can be purchased directly from the Store for 69 Extra Credits. This item is often referred to as a "Cat", is an item that is required to complete the Otaku Party: Cat Cafe.

Moneydogs can be obtained in various boxes, the Spinner, and other events! Players may also purchase this item directly from the Store for 49 Extra Credits. This item is often referred to as a "Dog", and 2 of these items are required to complete the VIP Party: Dog Star.

Invites can only be obtained & used during specified hunts when Invite Parties are released. During those hunts, Invites are available in the store for 5 Extra Credits each. Unlike the previous two items, Invite Parties require several invites to complete the given party, depending on the difficulty.
Retired Party Drops
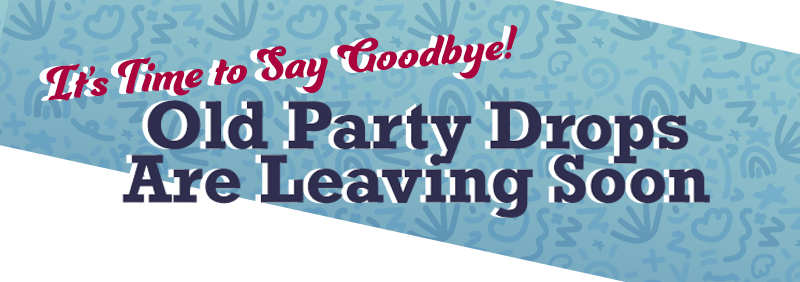
As of June 18th 2026, ATA retired nearly all of the previously existing party drops and released new ones!
Full List of Retired Drops:
Toilet Seat
Cracked aPhone
Ultimate Trophy
Top Dog Trophy
NO DUMPING Sign
PimD Varsity Jacket
Catsuit
Beer Bong
Dirty Poster
Hot Wings
Dubstep Keyboard
Hipster Coffee
Coyote Hood
Dumpster Burrito
Fixie
Greasy Breakfast
Moustache
Cut-Offs
Hipster Tee
Retro Camera
Porta Potty
Retro Camera PRO
Festival Boots
Leather Jacket
YOUR MOM Tattoo
Electric Guitar
YOUR MOM Tattoo PRO
Cat Skeleton
Wolfenstein
Cactus
Cat Skeleton PRO
Wolfenstein PRO
Seal Pug
Teevee
Unicorn Sculpture
Teevee PRO
Unicorn Sculpture PRO
Hipster Coffee PRO
Horse Mask
Dumpster Burrito PRO
Studded Shades
Fixie PRO
Greasy Breakfast PRO
3-Legged Shelter Dog
Cut-Offs PRO
Hipster Tee PRO
Swag Bag
Bikini and Trunks
Swag Bag PRO
Bikini and Trunks PRO
Keytar
VIP Pass
DJ Headphones
Hot Tub
Health Water
VIP Pass PRO
DJ Headphones PRO
Monkey Limo Driver
Champagne Waterfall
Monkey Limo Driver PRO
Champagne Waterfall PRO
Manga
Bowl of Ramen
Manga PRO
Bowl of Ramen PRO
Karaoke Microphone
Cosplay Costume
Popsicle
Karaoke Microphone PRO
Cosplay Costume PRO
Bento Box PRO
Panda
Plane Ticket to Japan
Daruma Doll
Plane Ticket to Japan PRO
Lucky Bub PRO
Daruma Doll PRO
School Uniform PRO
Zombie Bro Head
Zombie Bro Torso
Beach Biter
Wiseass Wizard
Zombie Bro Arms
Zombie Bro Legs
Party Wolf
The Cook
Buff Pup
Pineapple Tank
Wolverine Fail
Anime Wig
Space Princess Cosplay
Blue Bits Blade
Pink Pixel Powersword
Tomogotcha
Supa Pup
Space Raccoon
Avacat
Boy Space Cooties
Green Guy
Girl Space Cooties
Xenomorph Type-M
Xenomorph Type-F
Uranus
Second-Hand Skultron
King of Hearts Card
Queen of Diamonds Card
Fear and Loafing
Whoops-a-Baby!
Vegas Ring Bearer
Street Art
Tattoo Pen
Paint Cans
Blank Canvas
New Party Drops 2026
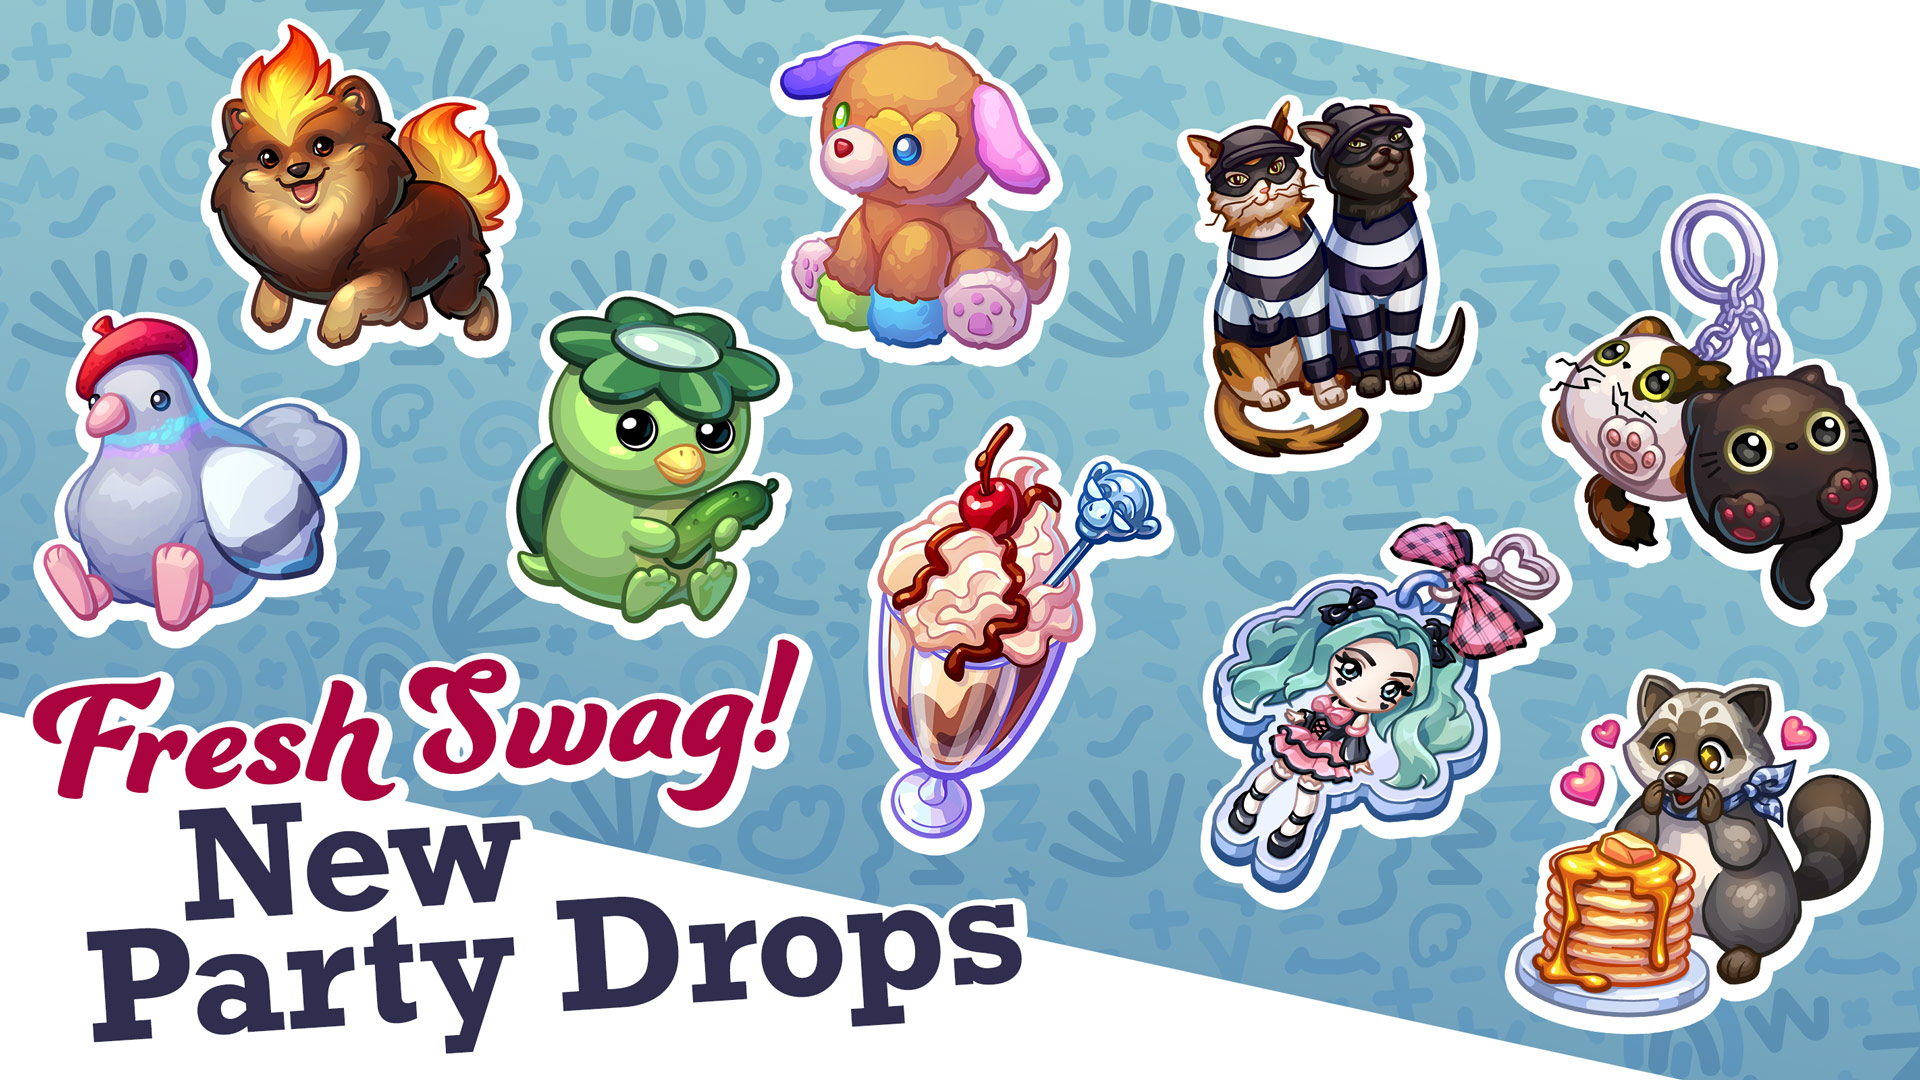
On June 18th, 2026, ATA released new party drops. Unlike the older, retired party drops, these new drops do have different stat bonuses. It was later discovered by players that some items also combine into new stat items! This was confirmed by a developer shortly after the release of the new items.
Combinable Drops

Item Name: Mythical Downeycorn
Combination: Not Yet Found
Art Skool Drops

Item Name: Snark-Proof Cactus
Dropping From: Fake Art 101

Item Name: Snark-Proof Cactus PRO
Dropping From: Fake Art 101 (PRO)

Item Name: Tatted Cat
Dropping From: DIY Tattoo

Item Name: Tatted Cat PRO
Dropping From: DIY Tattoo (PRO)

Item Name: Pigeon Maestro
Dropping From: Factory Art

Item Name: Pigeon Maestro PRO
Dropping From: Factory Art (PRO)

Item Name: Just a Potato
Dropped From: Off The Griddle (PRO), Art Starzzz

Item Name: Bold Moose
Dropping From: Art Starzzz

Item Name: Bold Moose PRO
Dropping From: Art Starzzz (PRO)

Item Name: Rainbow Sweetie Pup
Dropping From: Hype Machine (PRO)

Item Name: Octo-DJ
Dropping From: Hype Machine

Item Name: Octo-DJ PRO
Dropping From: Hype Machine (PRO)

Item Name: Artsy Ratsy
Dropping From: Backalley Debut

Item Name: Artsy Ratsy PRO
Dropping From: Backalley Debut (PRO)

Item Name: Little Kappa
Dropping From: Pizza Pop (Art)

Item Name: Gigacrackers
Dropping From: Pizza Pop (Art), Invite Parties

Item Name: Catstellation
Dropping From: Pizza Pop (Art), Dog Star, Cat Cafe
The Bro Code Drops

Item Name: Prankster Cats
Dropping From: Prank Primer

Item Name: Prankster Cats PRO
Dropping From: Prank Primer (PRO)

Item Name: James and Spooky Boy Keychain
Dropping From: All Roads Lead To Beer (PRO), Prank Primer (PRO)

Item Name: Frisbee Cats
Dropping From: Frisbee Follies

Item Name: Frisbee Cats PRO
Dropping From: Frisbee Follies (PRO)

Item Name: Cat Burglars
Dropping From: All Roads Lead to Beer

Item Name: Cat Burglars PRO
Dropping From: All Roads Lead to Beer (PRO)

Item Name: Beer-Me Cats
Dropping From: Restless Keg Syndrome

Item Name: Beer-Me Cats PRO
Dropping From: Restless Keg Syndrome (PRO)

Item Name: Brostep Cats
Dropping From: IT’S BROSTEP, BRAH!

Item Name: Brostep Cats PRO
Dropping From: IT’S BROSTEP, BRAH! (PRO)

Item Name: Fitness Cats
Dropping From: Fitspiration

Item Name: Fitness Cats PRO
Dropping From: Fitspiration (PRO)
Slack Pack Drops

Item Name: Fritters at the Cafe
Dropping From: Coffee Culture

Item Name: Fritters at the Cafe PRO
Dropping From: Coffee Culture (PRO)

Item Name: Fritters in the Quad
Dropping From: Quad Goals

Item Name: Fritters in the Quad PRO
Dropping From: Quad Goals (PRO)

Item Name: Fritters in the Skate Park
Dropping From: Easy Ride

Item Name: Fritters in the Skate Park PRO
Dropping From: Easy Ride (PRO)

Item Name: Fritters at the Diner
Dropped From: Off The Griddle

Item Name: Fritters at the Diner PRO
Dropped From: Off The Griddle (PRO)
Item Name: Just a Potato
Dropped From: Off The Griddle (PRO), Art Starzzz

Item Name: Fritters at Band Practice
Dropping From: Band Together

Item Name: Fritters at Band Practice PRO
Dropping From: Band Together (PRO)

Item Name: Fritters on the Leaderboard
Dropped From: High Score

Item Name: Fritters on the Leaderboard PRO
Dropped From: High Score (PRO)

Item Name: Chief Executive Fritters
Dropped From: Coffee Culture (PRO), Easy Ride (PRO), Off the Griddle (PRO), Band Together (PRO)
VIP Pass Drops

Item Name: Cherry Delight Cocktail
Dropping From: Afternoon Delight

Item Name: Cherry Delight Cocktail PRO
Dropping From: Afternoon Delight (PRO)

Item Name: Hawaiian Cabana Cocktail
Dropping From: Cabana Cool

Item Name:Hawaiian Cabana Cocktail PRO
Dropping From: Cabana Cool (PRO)

Item Name: Velvet Rope Cocktail
Dropping From: Wait-Listed

Item Name: Velvet Rope Cocktail PRO
Dropping From: Wait-Listed (PRO)

Item Name: Disco Dancer Cocktail
Dropping From: Just Dance!

Item Name: Limo Monkey Cocktail
Dropping From: Limo Luxury

Item Name: Limo Monkey Cocktail PRO
Dropping From: Limo Luxury (PRO)

Item Name: Skyhigh Champagne Cocktails
Dropping From: Skyhigh Party

Item Name: Very Important Cocktail
Dropping From: Skyhigh Party (PRO)

Item Name: Skyhigh Champagne Cocktails PRO
Dropping From: Skyhigh Party (PRO)

Item Name: Sakura Panda
Dropping From: Dog Star

Item Name: Pyrepom
Dropping From: Dog Star

Item Name: Priceless Toilet
Dropping From: Dog Star
Item Name: Catstellation
Dropping From: Pizza Pop (Art), Dog Star, Cat Cafe
Otaku Drops

Item Name: Manga Artist Charm
Dropping From: Draw Manga!

Item Name: Manga Artist Charm PRO
Dropping From: Draw Manga! (PRO)

Item Name: Ramen Eater
Dropping From: Noodle Express

Item Name: Ramen Eater PRO
Dropping From: Noodle Express (PRO)

Item Name: Magical Girl Wands
Dropping From: Karaoke Night (PRO), Big in Japan (PRO)

Item Name: Karaoke Singer Charm
Dropping From: Karaoke Night

Item Name: Karaoke Singer Charm PRO
Dropping From: Karaoke Night (PRO)

Item Name: Cosplay Maker Charm
Dropping From: Cosplay Please

Item Name: Cosplay Maker Charm PRO
Dropping From: Cosplay Please (PRO)

Item Name : Anime Cutie Charm
Dropping From: Anime Expo

Item Name : Anime Cutie Charm PRO
Dropping From: Anime Expo (PRO)

Item Name: Japan Souvenir Charms
Dropping From: Big in Japan

Item Name: Japan Souvenir Charms PRO
Dropping From: Big in Japan (PRO)
Item Name: Catstellation
Dropping From: Pizza Pop (Art), Dog Star, Cat Cafe
Invite Drops

Item Name: Americana Milkshakes
Dropping From: Novelty Novice, Bottle Rocket Rookie, Mid-Way Mortar, Senior Sparkler, Explosive Expert
Screenshots taken by @GoddessHailey and @-Ahli-LovesMike
Regular Parties
Art Skool

Fake Art 101 (Easy)
Damage Needed to Complete: 37,000 damage
Lecture: 10,000 damage
Snark: 10,000 damage
Sigh: 2,500 damage
Rave: 2,500 damage
Last Bar: 12,000 damage
Drops: Retro Camera, Porta Potty
Duration: 2 hours
DIY Tattoo (Easy)
Damage Needed to Complete: 88,500 damage
Lecture: 8000 damage
Rave: 8,250 damage
Rave: 8,250 damage
Snark: 56,000 damage
Last Bar: 8,000 damage
Drops: YOUR MOM Tattoo, Electric Guitar, Porta Potty
Duration: 3 hours
Factory Art (Easy)
Damage Needed to Complete: 70,000 damage
Rave: 8,500 damage
Rave: 8,500 damage
Snark: 30,000 damage
Sigh: 6,500 damage
Last Bar: 16,500 damage
Drops: Cat Skeleton, Porta Potty
Duration: 4 hours
Art Starzzz (Easy)
Damage Needed to Complete: 97,000 damage
Rave: 13,000 damage
Snark: 43,000 damage
Lecture: 15,000 damage
Rave: 13,000 damage
Last Bar: 13,000 damage
Drops: Wolfenstein, Cactus, Electric Guitar, Porta Potty
Duration: 4 hours
Hype Machine (Easy)
Damage Needed to Complete: 92,500 damage
Rave: 28,000 damage
Lecture: 13,000 damage
Rave: 28,000 damage
Sigh: 9,500 damage
Last Bar: 42,000 damage
Drops: TeeVee, Cactus, Porta Potty
Duration: 4 hours
Back Alley Debut (Easy)
Damage Needed to Complete: 201,000 damage
Rave: 28,000 damage
Rave: 28,000 damage
Snark: 64,000 damage
Snark: 64,000 damage
Last Bar: 17,000 damage
Drops: Unicorn Sculpture, Cactus, Electric Guitar, Porta Potty
Duration: 5 hours
Pizza Pop (Art)
Damage Needed to Complete: 47,500 damage
Rave: 12,500 damage
Lecture: 10,000 damage
Snark: 17,500 damage
Last Bar: 7,500 damage
Drops: Cloudpaca, Kitsune
Duration: 3 hours
The Bro Code

Prank Primer
Damage Needed to Complete: 46,500 damage
Bro-Fist: 7,500 damage
Swipe: 4,000 damage
Fight: 35,000 damage
Drops: Toilet Seat
Duration: 1 hour
Note: The Swipe Bar must be hit first, and players can actually lose regen by hitting the Fight Bar on this particular party.
Frisbee Follies
Damage Needed to Complete: 40,000 damage
Chug: 7,500 damage
Bro-Fist: 7,500 damage
Fight: 17,500 damage
Last Bar: 7,500 damage
Drops: Ultimate Trophy
Duration: 2 hours
All Roads Lead to Beer
Damage Needed to Complete: 53,000 damage
Part One: 28,500 damage
Fight: 17,500 damage
Chug: 7,500 damage
Swipe: 3,500 damage
Part Two: 24,500 damage
Swipe: 3,500 damage
Fight: 17,500 damage
Swipe: 3,500 damage
Drops: NO DUMPING Sign, Catsuit, Cracked aPhone, PIMD Varsity Jacket
Duration: 2 hours
Restless Keg Syndrome
Damage Needed to Complete: 101,500 damage
Part 1: 32,000 damage
Fight: 17,500 damage
Steal: 3,500 damage
Steal: 3,500 damage
Bro-Fist: 7,500 damage
Part 2: 40,000 damage
Chug: 7,500 damage
Chug: 7,500 damage
Fight: 17,500 damage
Bro-Fist: 7,500 damage
Part 3: 29,500 damage
Chug: 7,500 damage
Chug: 7,500 damage
Chug: 7,500 damage
Last Bar: 7,000 damage
Drops: Beer Pong, Dirty Poster, Hot Wings
Duration: 3 hours
It’s Brostep, Brah!
Damage Needed to Complete: 172,000 damage
Part 1: 56,500 damage
Bro-Fist: 7,500 damage
Fight: 17,500 damage
Chug: 7,500 damage
Fight: 24,000 damage
Part 2: 61,000 damage
Fight: 23,000 damage
Chug: 10,000 damage
Swipe: 5,000 damage
Fight: 23,000 damage
Part 3: 54,500 damage
Bro-Fist: 9,000 damage
Chug: 9,500 damage
Swipe: 4,500 damage
Bro-Fist: 9,000 damage
Last Bar: 22,500 damage
Drops: Dubstep Keyboard, Dirty Poster, Hot Wings, Catsuit
Duration: 4 hours
Fitspiration
Damage Needed to Complete: 172,500 damage
Bro-Fist: 25,500 damage
Swipe: 9,500 damage
Chug: 27,000 damage
Fight: 60,000 damage
Last Bar: 50,500 damage
Drops: Buff Pup
Duration: 4 hours
Note: The Chug Bar must be hit first, at this particular party.
Slack Pack

Previously known as Hipster.
Coffee Culture
Damage Needed to Complete: 48,000 damage
Snark: 14,250 damage
Snark: 14,250 damage
Sigh: 3,000 damage
Lecture: 16,500 damage
Drops: Hipster Coffee, Catsuit, Cracked aPhone, Coyote Hood
Duration: 2 hours
Quad Goals
Damage Needed to Complete: 70,500 damage
Lecture: 8,000 damage
Rave: 8,500 damage
Sigh: 6,000 damage
Rave: 8,500 damage
Last Bar: 39,500 damage
Drops: Dumpster Burrito, Cracked aPhone, Coyote Hood
Duration: 3 hours
Easy Ride
Damage Needed to Complete: 68,000 damage
Sigh: 6,500 damage
Rave: 8,500 damage
Rave: 8,500 damage
Snark: 28,000 damage
Last Bar: 16,500 damage
Drops: Fixie, Catsuit, Cracked aPhone, Coyote Hood
Duration: 3 hours
Off The Griddle
Damage Needed to Complete: 92,500 damage
Rave: 12,700 damage
Rave: 12,700 damage
Snark: 42,300 damage
Lecture: 12,300 damage
Last Bar: 12,500 damage
Drops: Greasy Breakfast, Moustache, Cracked aPhone, Coyote Hood
Duration: 4 hours
Band Together
Damage Needed to Complete: 93,000 damage
Sigh: 9,500 damage
Lecture: 12,250 damage
Lecture: 12,250 damage
Snark: 42,000 damage
Last Bar: 17,000 damage
Drops: Cut-Offs, Moustache, Cracked aPhone, Coyote Hood
Duration: 4 hours
High Score
Damage Needed to Complete: 119,500 damage
Rave: 17,000 damage
Sigh: 12,500 damage
Rave: 17,000 damage
Lecture: 16,500 damage
Last Bar: 56,500 damage
Drops: Hipster Tee, Moustache, Catsuit, Cracked aPhone, Coyote Hood
Duration: 5 hours
VIP Pass

Afternoon Delight
Damage Needed to Complete: 147,500 damage
High-Five: 30,500 damage
Drink: 20,000 damage
Tease: 13,000 damage
Complain: 40,000 damage
Last Bar: 44,000 damage
Drops: Electric Guitar, Porta Potty, Hot Tub, Swag Bag
Duration: 3 hours
Cabana Cool
Damage Needed to Complete: 186,000 damage
Tease: 16,000 damage
Drink: 40,000 damage
High-Five: 35,000 damage
Drink: 40,000 damage
Last Bar: 55,000 damage
Drops: Porta Potty, Hot Tub, Bikini and Trunks
Duration: 4 hours
Wait-Listed
Damage Needed to Complete: 165,000 damage
Complain: 40,000 damage
High-Five: 37,000 damage
Tease: 19,000 damage
Drink: 35,500 damage
Last Bar: 33,500 damage
Drops: Electric Guitar, Porta Potty, Hot Tub, VIP Pass
Duration: 4 hours
Just Dance!
Damage Needed to Complete: 224,500 damage
Drink: 56,000 damage
High-Five: 39,000 damage
Complain: 41,000 damage
Drink: 56,000 damage
Last Bar: 32,500 damage
Drops: Health Water, Porta Potty, Hot Tub, DJ Headphones
Duration: 5 hours
Limo Luxury
Damage Needed to Complete: 180,000 damage
Complain: 42,000 damage
Tease: 25,000 damage
Drink: 36,000 damage
High-Five: 41,000 damage
Last Bar: 36,000 damage
Drops: Health Water, Porta Potty, Hot Tub, Monkey Limo Driver
Duration: 5 hours
Skyhigh Party
Damage Needed to Complete: 219,000 damage
High-Five: 43,000 damage
Drink: 60,000 damage
Drink: 60,000 damage
Tease: 28,000 damage
Last Bar: 28,000 damage
Drops: Health Water, Electric Guitar, Porta Potty, Hot Tub
Duration: 5 hours
Dog Star
Damage Needed to Complete: 117,500 damage
Tease: 29,000 damage
Complain: 24,000 damage
High-Five: 40,000 damage
Last Bar: 24,500 damage
Duration: 4 hours
Otaku

Draw Manga!
Damage Needed to Complete: 67,500 damage
Giggle: 7,500 damage
Peace-Sign: 17,500 damage
Facepalm: 7,500 damage
Eat: 17,500 damage
Last Bar: 17,500 damage
Drops: Manga
Duration: 2 hours
Noodle Express
Damage Needed to Complete: 112,000 damage
Peace-Sign: 35,000 damage
Eat: 25,000 damage
Eat: 25,000 damage
Giggle: 12,000 damage
Last Bar: 15,000 damage
Drops: Bowl of Ramen
Duration: 4 hours
Karaoke Night
Damage Needed to Complete: 191,000 damage
Peace-Sign: 52,000 damage
Giggle: 17,000 damage
Facepalm: 30,000 damage
Peace-Sign: 52,000 damage
Last Bar: 40,000 damage
Drops: Karaoke Microphone
Duration: 4 hours
Cosplay Please
Damage Needed to Complete: 168,500 damage
Giggle: 30,000 damage
Giggle: 30,000 damage
Facepalm: 46,500 damage
Eat: 22,000 damage
Last Bar: 48,000 damage
Drops: Popsicle, Cosplay Costume
Duration: 4 hours
Anime Expo
Damage Needed to Complete: 267,000 damage
Facepalm: 53,000 damage
Peace-Sign: 72,000 damage
Peace-Sign: 72,000 damage
Giggle: 25,000 damage
Last Bar: 45,000 damage
Drops: Plane Ticket to Japan
Duration: 5 hours
Big in Japan
Damage Needed to Complete: 292,500 damage
Giggle: 40,700 damage
Peace-Sign: 99,500 damage
Peace-Sign: 99,500 damage
Eat: 39,300 damage
Last Bar: 13,500 damage
Drops: Daruma Doll
Duration: 5 hours
Cat Cafe
Damage Needed to Complete: 95,000 damage
Eat: 20,000 damage
Facepalm: 25,000 damage
Peace-Sign: 35,000 damage
Last Bar: 15,000 damage
Drops: White Tiger, Cloudpaca, Baby Kitsune, School Uniform PRO, Bento Box PRO
Duration: 4 hours
Invite Parties
Invite Parties function the same in terms of damage, but have a different appearance or theme depending on the hunt.
4 Invite Party
Damage Needed to Complete: 38,000 damage
Fight: 10,000 damage
Prank: 8,000 damage
Rave: 14,000 damage
Last Bar: 6,000 damage
Duration: 3 hours
7 Invite Party
Damage Needed to Complete: 63,000 damage
Fight: 17,500 damage
Prank: 14,000 damage
Rave: 22,000 damage
Last Bar: 9,500 damage
Duration: 4 hours
10 Invite Party
Damage Needed to Complete: 99,000 damage
Fight: 27,500 damage
Prank: 22,000 damage
Rave: 34,500 damage
Last Bar: 15,000 damage
Duration: 6 hours
15 Invite Party
Damage Needed to Complete: 155,500 damage
Fight: 43,200 damage
Prank: 34,500 damage
Rave: 54,200 damage
Last Bar: 23,600 damage
Duration: 8 hours
22 Invite Party
Damage Needed to Complete: 244,400 damage
Fight: 67,900 damage
Prank: 54,200 damage
Rave: 85,200 damage
Last Bar: 37,100 damage
Duration: 10 hours
Black Cat Cafe
Damage Needed to Complete: 100,000 damage
Eat: 25,000 damage
Facepalm: 25,000 damage
Peace-Sign: 35,000 damage
Last Bar: 15,000 damage
Duration: 4 hours
Eat: 25,000 damage
Facepalm: 25,000 damage
Peace-Sign: 35,000 damage
Last Bar: 15,000 damage
Duration: 4 hours
PRO Parties (TBA)
Fake Art 101(PRO)
Damage Needed to Complete: 235,000 damage
Lecture: 30,000 damage
Rave: 15,000 damage
Sigh: 30,000 damage
Snark: 80,000 damage
Last Bar: 80,000 damage
Drops:
Duration: 4 hours
This is still a work in progress, but will be added in the future!
Damage Needed to Complete: 235,000 damage
Lecture: 30,000 damage
Rave: 15,000 damage
Sigh: 30,000 damage
Snark: 80,000 damage
Last Bar: 80,000 damage
Drops:
Duration: 4 hours
This is still a work in progress, but will be added in the future!
Super PRO Parties
On July 6 2016, ATA introduced Fake Art 101(SUPER PRO) & DIY Tattoo(SUPER PRO). Super Pro parties had increased difficulty, drops, and payout compared to both Regular and Pro parties. Additionally, in these parties, players could receive exclusive miscellaneous items and avatars as rewards as shown below.
Street-Art
Fake Art 101 (SUPER PRO)
250,000/250,000
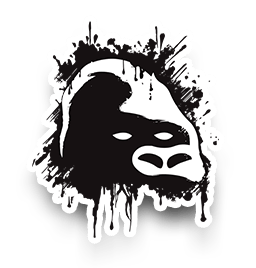
Tattoo Pen
DIY Tattoo (SUPER PRO)
250,000/250,000
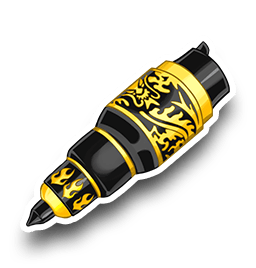
In order to receive the avatar rewards, players had to collect combined amounts of the new drops:
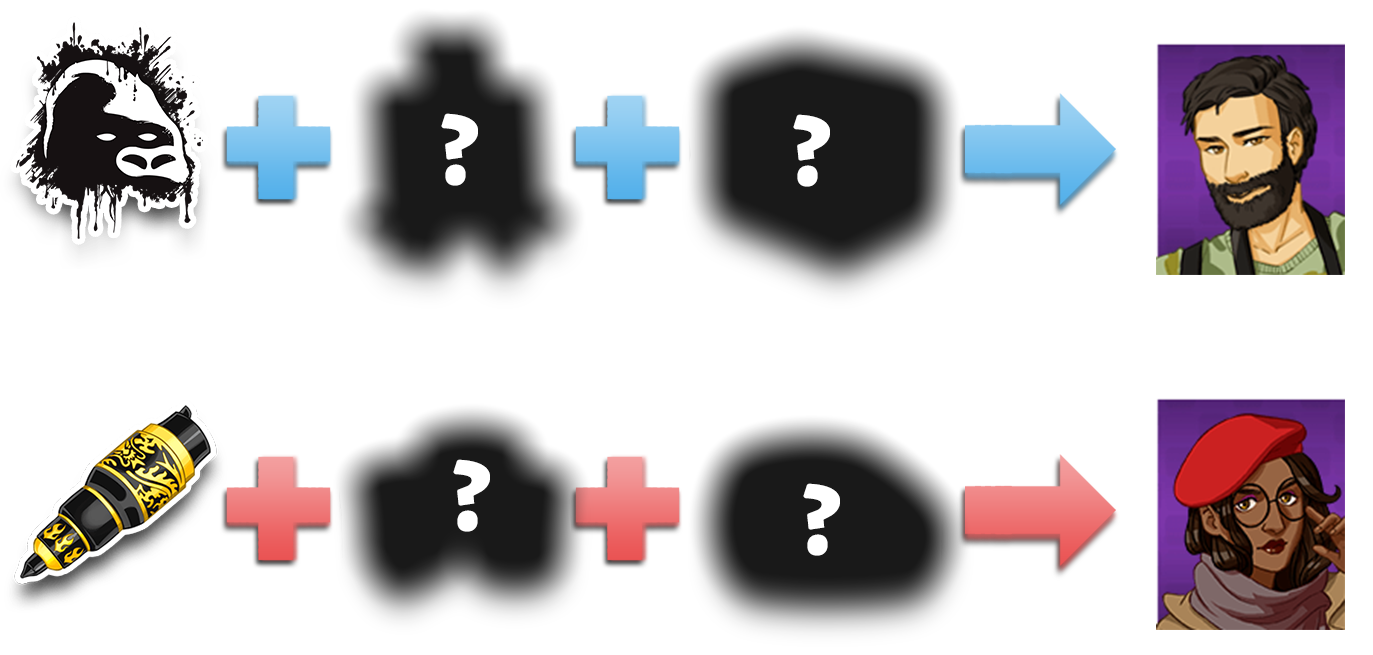
On August 19 2016, Super Pro Parties were removed indefinitely.
Street-Art
Fake Art 101 (SUPER PRO)
250,000/250,000
Tattoo Pen
DIY Tattoo (SUPER PRO)
250,000/250,000
In order to receive the avatar rewards, players had to collect combined amounts of the new drops:
On August 19 2016, Super Pro Parties were removed indefinitely.
Weekend Getaway: Mansion Mayhem
How Does this Party Work?
1. Start the Party
(60 Party Rental Keys needed to initiate)
2. Hit the FLIRT bar
This bar has high difficulty, and players can fail hits.
3. Hit the VIBE bar
This bar takes constant damage and a lot of health, so ideally everyone in the club hits this bar. All attacks are guaranteed to land successfully on this bar.
4. Buy the "Drop The Bass" buff and Hit the DANCE bar
Players first need to buy the "Drop the Bass" buff from Molly’s to be able to hit this bar, and each player can only buy this only once. Once you purchase the "Drop the Bass" buff, you’ll have 5 minutes to Dance as much as you want.
Hitting the bar without having Drop The Bass ready will fail automatically AND cost you energy. Make sure you don't claim the buff before you're ready to hit the Dance bar. You can only get it once and you'll lose your chance to participate.
When your Club is done with the Dance bar, designate one member of your Club to buy and use the "Lights On, Party's Over" item. Once this item is used, it will instantly finish the bar and allow the Club to finish the Party!
You only need 'Lights On, Party's Over' item ONCE and once it is dropped, the bar ends and no more people can hit it, even if they have Drop The Bass active. You can only use 'Lights On, Party's Over' when your Drop The Bass buff is active. Make sure the last person knows to use the item within their 5 minute window! If you don't drop 'Lights On, Party's Over' you may fail the party.
5. Dance Finale
"Extra hits to finish the party off and celebrate!" Not entirely sure what this entails, but details will be added as information is found.
More information will be added once the trial run is over!
Troubleshooting and Common Issues
Double Cat Drop
Missing Drops
Missing Notifications
This issue occurs often during flashes or promos when players are attempting to drop a cat at the same time. If the cat is no longer in your inventory, take a ss of the chat showing there were multiple drops in one party and send a ticket to Support.
Missing Drops
During new hunts it is common to see a delay of notifications, however, if you receive a party notification with no drops it is best to send in a ticket to Support. Most of the time though, these drops are fixed later in the hunt.
Missing Notifications
Typically “missing” notifications are just extremely delayed. On the off chance though that you are missing a notification for an extended period of time, sending in a ticket through support may help. This can also happen during flashes when many consumable items are used at once.
FAQ
When were invite parties introduced?
Is it easier to get Max Drops if you’re larger in stats?
How often are invite parties available?
How can I tell how many hits someone had in a party?
It’s debatable when invite parties first started though, since the first-ever invite-style party was in May 2017 during the P-ARRRR!-ty in My Dorm Hunt. However, the first invite party in the format we are familiar with now was during the Thailand in the Sun Hunt.
Is it easier to get Max Drops if you’re larger in stats?
You can meet the requirements for max drops in a party in fewer hits as you get larger in stats, so technically yes. But it is your ability to do more damage on a given bar that makes it easier to get max drops, rather than your stats directly.
How often are invite parties available?
There is not a set schedule or date that invites appear as of now. However, they are most commonly seen at the following holidays: New Year, Valentine’s Day, St. Patrick’s Day, Easter, Fourth of July, Halloween, and Christmas.
How can I tell how many hits someone had in a party?
Go to the Club icon off the main menu, then scroll down to the Club History and select Parties. From there you can look at specific parties completed, and see how many actions someone had on a party.
Thank You & Other Useful Threads
Check out the amazing individuals who helped make this possible!
Editing
❀ -iLyssatheGummyBearKissa- ❀ ChoKing ❀ Pride ❀
War-King
A huge thank you to him for allowing me to use some of the information from his previous guide on Art Skool parties and for allowing me the opportunity to work with this idea. I truly couldn’t have completed this without your understanding and support.
Completing Parties & Suggested Ideas
❀ Amor ❀ ChoKing ❀ Kiera ❀ Mark ❀ Michelle-KiLling_You_4_Fun ❀ Ronin ❀ TheRealCampus ❀ TheRoamingGnome ❀ WhoIsDavid ❀ WhoIsTina ❀ GoddessHailey ❀ Geass ❀
Box Database|Pro Stat Drop DatabaseParty of the Day|Post Your Club Banner Here !!|Plunder Guide
Last edited:


 Thank you so much for taking all the time and effort it took to create this post. It’ll be super helpful for players to help understand parties.


 It looks amazing. Glad I could help
 ily
 I am trying to figure out why box drops are irregular on POTD? Anyone knows ?